
Low sodium fig bars
- Jan 12, 2023
- 3 min read
I've never loved Fig Newtons, but I love these Weelicious Homemade Fig Bars. When you first bake them, they're more cookie-like. After a day or two, they taste more cake-like. Either way they are delicious and best of all, low sodium. I modified the original recipe to use 170g of whole wheat flour rather than white whole wheat (because that's what I had), and I omitted the honey from the fig mixture because the dried figs I had were quite plump and sweet on their own. If I had figs that were dry and bland, I would have opted for the honey. The original recipe calls for 15-20 minutes of baking time, but I've found I need to bake them for about 22-23 minutes.
The recipe makes 20 cookies, each with just 3.5 mg of sodium. A store bought Fig Newtown has 65 mg of sodium per cookie so that's a huge win.

Servings: 20 cookies
Sodium: 3.5 mg sodium per cookie
Time: 1 hour
Ingredients:
6 ounces dried figs (about a cup of whole dried figs)
1 tablespoon honey (optional)
85 g (6 tablespoons) butter, softened
1/2 cup sugar
1 large egg
1 tsp vanilla extract
170 g (1 and 1/2 cups) whole wheat flour
1) Place dried figs in small bowl and cover with hot water. Let sit about 15 minutes until the figs are soft. Then transfer the figs to the bowl of a food processor (reserving the soaking liquid), add honey if desired, and pulse until pasty. If the figs are too thick, drizzle in some of the soaking liquid 1 tablespoon at a time until you get the right consistency. You want it thick but spreadable.
This fig paste freezes really well so if you find yourself making these cookies often, make a double batch of the figs and freeze half in a ziplock bag for your next round of cookies.


2) In a medium sized bowl, cream the butter and sugar. Add the egg and vanilla and mix until fully incorporated. Then add the flour and mix to combine.


3) Shape the dough into a ball, place back in the bowl, cover with plastic wrap and refrigerate for 10 minutes. The dough is a little sticky at this point and it will be easier to handle if it's been chilled for just a little bit. Preheat your oven to 350°F.
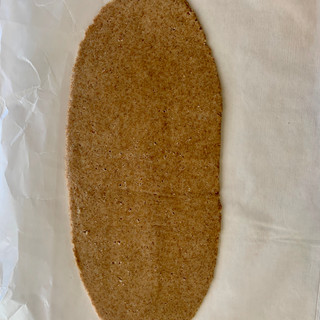
4) Take half the dough, and put the other half back in the fridge. Shape it into a log, and place it between two sheets of wax paper. Roll the dough out between the two pieces of wax paper with a rolling pin until it's about 12 inches long and 4 inches wide.
If the bottom piece of wax paper shifts while you're rolling, the dough will bunch up on the bottom side (as shown in the second picture here). Just turn it over and straighten out the wax paper, and roll it flat. The dough is very soft and easy to mold so do this as much as necessary to get a nice flat piece of dough.


5) When you roll it out, the dough will flatten out into an oval shape. Use your hands and press the edges so it's more rectangular. Then take half of the fig filling and spread it on one half of the rolled out dough, leaving a little room on the outer edge to seal.


6) Carefully fold the dough over by lifting the wax paper and peeling it away from the dough.
7) Use your fingers to press the edges so they're rounded and even. Then take a sharp knife and cut the dough into 10 equal pieces. I like to put a little oil on my knife and wipe it clean with a towel after each slice to keep the cuts clean. Repeat steps 4-6 with the second half of the dough and fig filling. Arrange the cookies on a 12x17 inch parchment lined baking sheet. They don't expand much when they bake so I put all 20 on the same baking sheet. Bake at 350°F for 20-24 minutes until the edges are just browned and crispy.


Let the cookies cool completely before storing them in an airtight container. They're crispy on the first day, but on the second and third day they take on a more cake-like texture. They never make it past day 3 in our house so I'm not sure what happens after that.
