
Low sodium, vegan, gluten-free coconut cream pie
- Nov 21, 2020
- 4 min read
This pie is for people who LOVE coconut because it uses coconut oil, coconut milk, coconut cream, and coconut flakes (you could even use coconut sugar!), all of which are naturally low sodium and gluten-free. I used my almond flour crust to keep it gluten-free and modified this Minimalist Baker Coconut Cream Pie recipe for the filling.

Servings: One 9-inch pie
Sodium: 95 mg for the entire pie
Time: 30 minutes active, but the pie filling needs to chill for about 2-3 hours, and then overnight.
Pie filling ingredients:
3 tablespoons cornstarch
1 can (13.5 ounces) coconut milk*
1/3 cup sugar
1 tsp vanilla extract
1 cup whipped coconut cream
Pie crust ingredients:
2 cups blanched almond flour*
5 tablespoons coconut oil*
3 tablespoons sugar
1/2 tsp vanilla
Optional toppings:
1/4 cup unsweetened toasted coconut flakes
1/4 cup sliced almonds, toasted
2 cups whipped coconut cream
*See Notes, below
1) Prepare the coconut filling - in a small saucepan (mine is 1.5 quarts) combine 3 tablespoons cornstarch, 1/3 cup sugar, and the entire can of coconut milk and whisk until there are no clumps. When you open the can of coconut milk, you'll probably find that the coconut milk fat is usually solidified at the top of the can. If you pour all the solids in with the cornstarch, it will be harder to mix and dissolve the cornstarch. Instead, start by measuring 3 tablespoons of cornstarch into your saucepan, then cut a hole through the solid coconut milk fat, and pour just the liquid coconut milk into the pot and whisk until there are no lumps. Then add the sugar and whisk some more, and then finally, use a rubber spatula to get all the solid coconut milk fat out. Cook on medium heat until the mixture starts to simmer, then turn the heat down and simmer for an additional 4-5 minutes longer, stirring regularly, until the coconut mixture has thickened. Add 1 teaspoon vanilla and stir to combine.


Here's a video of what the coconut mixture should look like when it's ready.
Pour the coconut mixture into a bowl and cover with plastic wrap. Put the plastic wrap flush against the surface of the mixture so it doesn't form a film on the surface. Chill in the refrigerator for about 2-3 hours.

2) Preheat oven to 350°F.
3) Make the crust - in a medium bowl, combine 2 cups almond flour, 5 tablespoons coconut oil, 3 tablespoons sugar, and 1/2 tsp vanilla. Mix with a spoon, and then your hands, until a crumbly dough forms. Although the dough is crumbly, it should hold together when you pinch it between your fingers. Transfer the dough mixture into a 9 inch pie plate and press it into the plate to form the pie crust. The key here is to press the dough so that it's even throughout the plate. Start by just pressing down into the dough in the middle of the plate, and then use your fingers and palm to even out the bottom and corners first, and then the edges last. Focus more on getting an even layer on the bottom of the pie, if some edges come up higher than others, it's really easy to just pinch off some of the dough from the higher/thicker sides and press them into other parts of the plate. Press the dough just to the edge of the plate and smooth it out. Transfer to the preheated oven and bake for about 15-18 minutes until just golden. It will still be a little soft to the touch when it comes out of the oven but will get harder as it cools. Remove the crust from the oven and set aside to cool until the pie filling is ready.


4) When the coconut mixture is done chilling in the refrigerator, add 1 cup of coconut whipped cream and and stir to combine. I used this Reddi Whip coconut milk cream from a can. It has no sodium and isn't overly sweet. You can make your own coconut whipped cream but I've had a hard time finding coconut cream lately.


5) Spoon the filling into the baked pie crust, and spread to even it out. Cover with plastic wrap and refrigerate overnight.


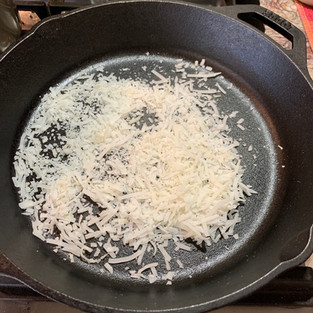
6) If you want to add coconut flakes and almonds, toast them on a dry skillet over medium heat for a few minutes until light brown. Once they turn light brown, transfer to a separate bowl so they don't keep browning in the pan.


7) When you're ready to serve the pie the next day, add some more whipped coconut cream to the top and sprinkle with toasted coconut flakes and almonds.

TIPS:
-Coconut milk for this pie is different than the coconut milk you would use to drink or as a milk substitute for cereal or oatmeal. It's sold in a can as opposed to a carton, and the ingredients should be just coconut milk. Make sure you get one that is unsweetened and has no salt aded. I like the Trader Joe's full fat coconut milk, but I think the low fat version would work just fine. My mom, who grew up on fresh coconut milk and is very picky about canned coconut milk, also approves of the Trader Joe's brand.

-Almond flour is either made from whole almonds (with the skin) or blanched almond (without the skin). The whole almonds make for a darker, grittier crust and need a little extra time for baking (about 3-4 minutes). I like both, but I think most people would prefer the blanched almond flour for this pie. A crust made from the blanched almond flour tastes like shortbread, and it's a bit softer but still holds up when you cut the pie. Just make sure you use a proper spatula to serve the slices so they don't break when you're lifting them out of the pie pan.

See the difference in color using the whole almonds (top pictures) versus blanched almonds (bottom pictures)?


-Coconut oil is either refined or unrefined. The unrefined has a stronger coconut flavor and that's what I use in this recipe. Make sure it's melted before you add it to the almond flour for the crust. You can just microwave for 20 seconds if your oil has solidified.


Comments